4 - Create a simple block (with a template)
Setup Instructions:
Before starting this exercise, please follow these instructions.
They explain how to setup your test environment and install the codefiles that come with this tutorial. Once these are installed, your local environment will look almost identical to the pictures below.
1.) Please follow the above setup instructions as those need to be performed in order for you to begin.
2.) Now, please go ahead and update your module’s config.xml so that it matches what is shown in the picture below. Or, if you don’t want to type this in, you can download this file and replace everything that is inside of config.xml with this content. The config.xml file should match the picture below!
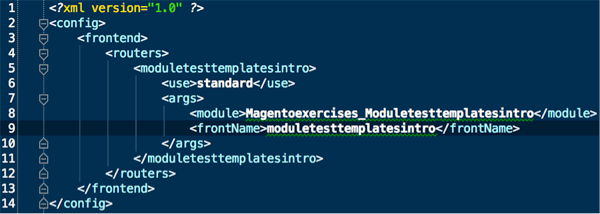
3.) Great, you have now created a route! Now, please go ahead and create a directory called ‘controllers’ in this module. Please create a new file inside of the controllers directory called IndexController.php.
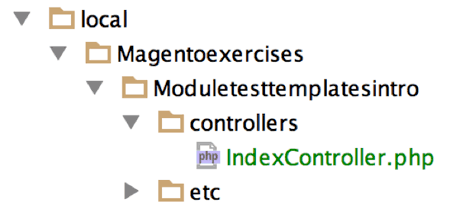
4.) Please, write the content you see below into the IndexController.php file. Or. You can download this file and paste the contents into the IndexController.php file.

Now, please navigate to yourdomain/moduletesttemplatesintro/index/test1. If your code is correct, you will see a page that looks like this. You can now proceed to the next step.

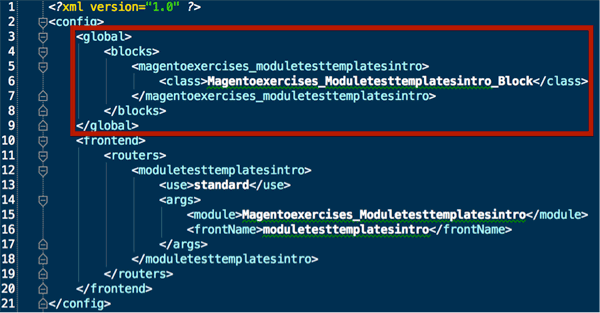
5.) Please add the following code in the red rectangle below to the config.xml file. This code tells Magento what directory this module’s blocks are located in. If you do not wish to type in this code manually, you can download it and paste it into this file.
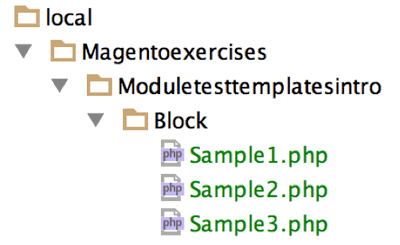
6.) Please create a directory called ‘Block’ and then create three files in this directory called Sample1.php, Sample2.php, Sample3.php.
7.) Please write the text in the picture below into Sample1.php. Or, you can download the file and paste it in. Please observe that this class extends Mage_Core_Block_Template. Any class that has a template file associated it must extend Mage_Core_Block_Template.

On line 11 above, please note that the location of the template file is being set to the value in the picture below.

8.) Now, please change the function called test1Action in IndexController.php so that it looks exactly like the picture below. Or, you can download this update and paste it into the test1Action function.

You have completed this step. Everything else mentioned in this step is just to increase your understanding.
Line 12 is very important. So, let’s discuss it in greater detail!
The purpose of line 12 is to create a block and then return it. What block is Magento looking for?
So, in line 12, ‘moduletesttemplatesintro/sample1’ is the argument that is being passed into the function called createBlock. This argument tells us the name of the block Magento is looking for.
The part of this argument before the slash is moduletesttemplatesintro.
moduletesttemplatesintro tells Magento that the class it is looking for starts with Magentoexercises_Moduletesttemplatesintro_Block.
We know this is the start of the classname, because the config.xml says that moduletesttemplatesintro corresponds to Magentoexercises_Moduletesttemplatesintro_Block. Please see the picture below.
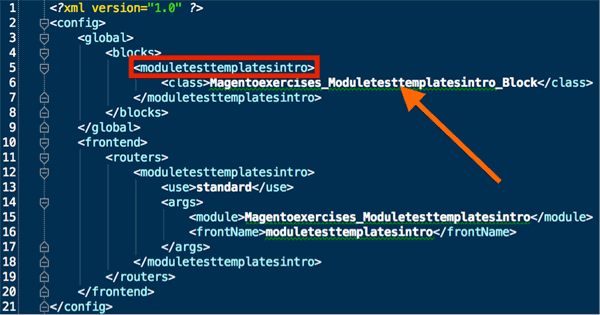
Great, so we just explained that the part of this argument moduletesttemplatesintro/sample1’, that comes before the slash tells us that the class magento is looking for starts with Magentoexercises_Moduletesttemplatesintro_Block.
But, what is the rest of the class name? All we need to do is add the part of the argument that comes after the slash onto Magentoexercises_Moduletesttemplatesintro_Block and capitalize it. The second part of the argument is sample1.
So, the class magento will return is “Magentoexercises_Moduletesttemplatesintro_Block” + “_” + “Sample1”
Magentoexercises_Moduletesttemplatesintro_Block_Sample1”
This file is pictured below. We already created it in steps 6 & 7.
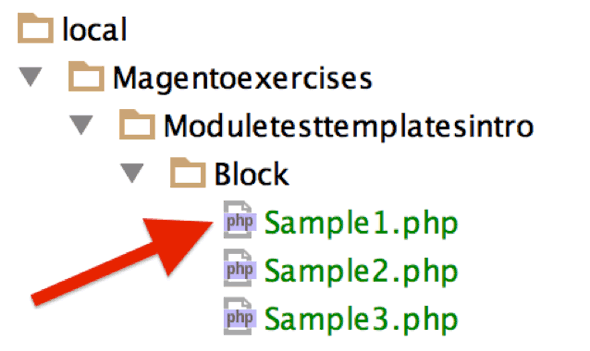
9.) Now, please copy the contents of Sample1.php into Sample2.php. In Sample2.php, Please find all occurrences of the number ‘1’ and replace it with the number ‘2’. After you make this update, Sample2.php will look just like the picture below.

Now, please copy everything inside of Sample1.php and paste this into Sample3.php. In Sample3.php, Please find all occurrences of the number ‘1’ and replace it with the number ‘3’.
10.) Please create the folder called moduletesttemplatesintro inside of the app/design/frontend/base/default/template folder. Then, please create three files in this directory called sample1.phtml, sample2.phtml, sample3.phtml.
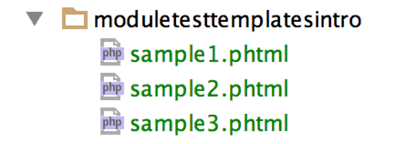
11.) Please type the following text into these three phtml files you created in the previous step.


12.) Now, please visit the url: yourdomain/moduletesttemplatesintro/index/test1. You should see the following. If you this text, please proceed to the next step.

13.) Totally awesome, great to see this page outputting sample1.phtml. But, how can we get Magento to output sample2.phtml and sample3.phtml. These are not being output in the above picture.
To make this happen, please update the function called test1Action in IndexController.php so that it is identical to the test1Action function in the picture below. (if you would rather not type in this update, you can download this content and paste it into test1Action)
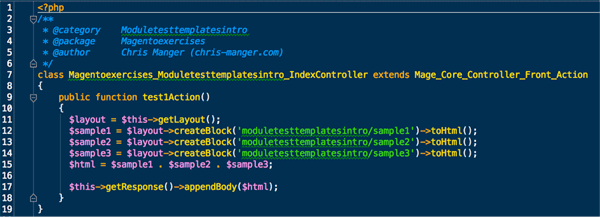
14.) Now, please refresh yourdomain/moduletesttemplatesintro/index/test1. You should see this…

Brilliance! You’re the man, nice job! You have now completed this tutorial.
Please note, if for some reason your code didn’t work. You are always welcome to download the solution here.


